SSO configuration

Automatically translated
As an owner or administrator of your organisation, you can configure Single Sign-On (SSO) via an identity provider (IdP) for your DeepCloud environment. This ensures that all users with a verified domain will log in automatically and centrally through this IdP in the future. This increases both security and user convenience during login.
Requirements
The requirements for the SSO configuration are:
- A domain verification is active
- At least subscription Large
- Connection of the IdP possible via OpenID Connect
- The email attribute is set in the IdP configuration for all users and matches the email address the user uses to log in to DeepBox.
Create SSO connection
- Open the domain / SSO configuration
- Open DeepAdmin and navigate to Organisation > Settings > Security & login, then click Manage. Select the desired domain to open its settings.
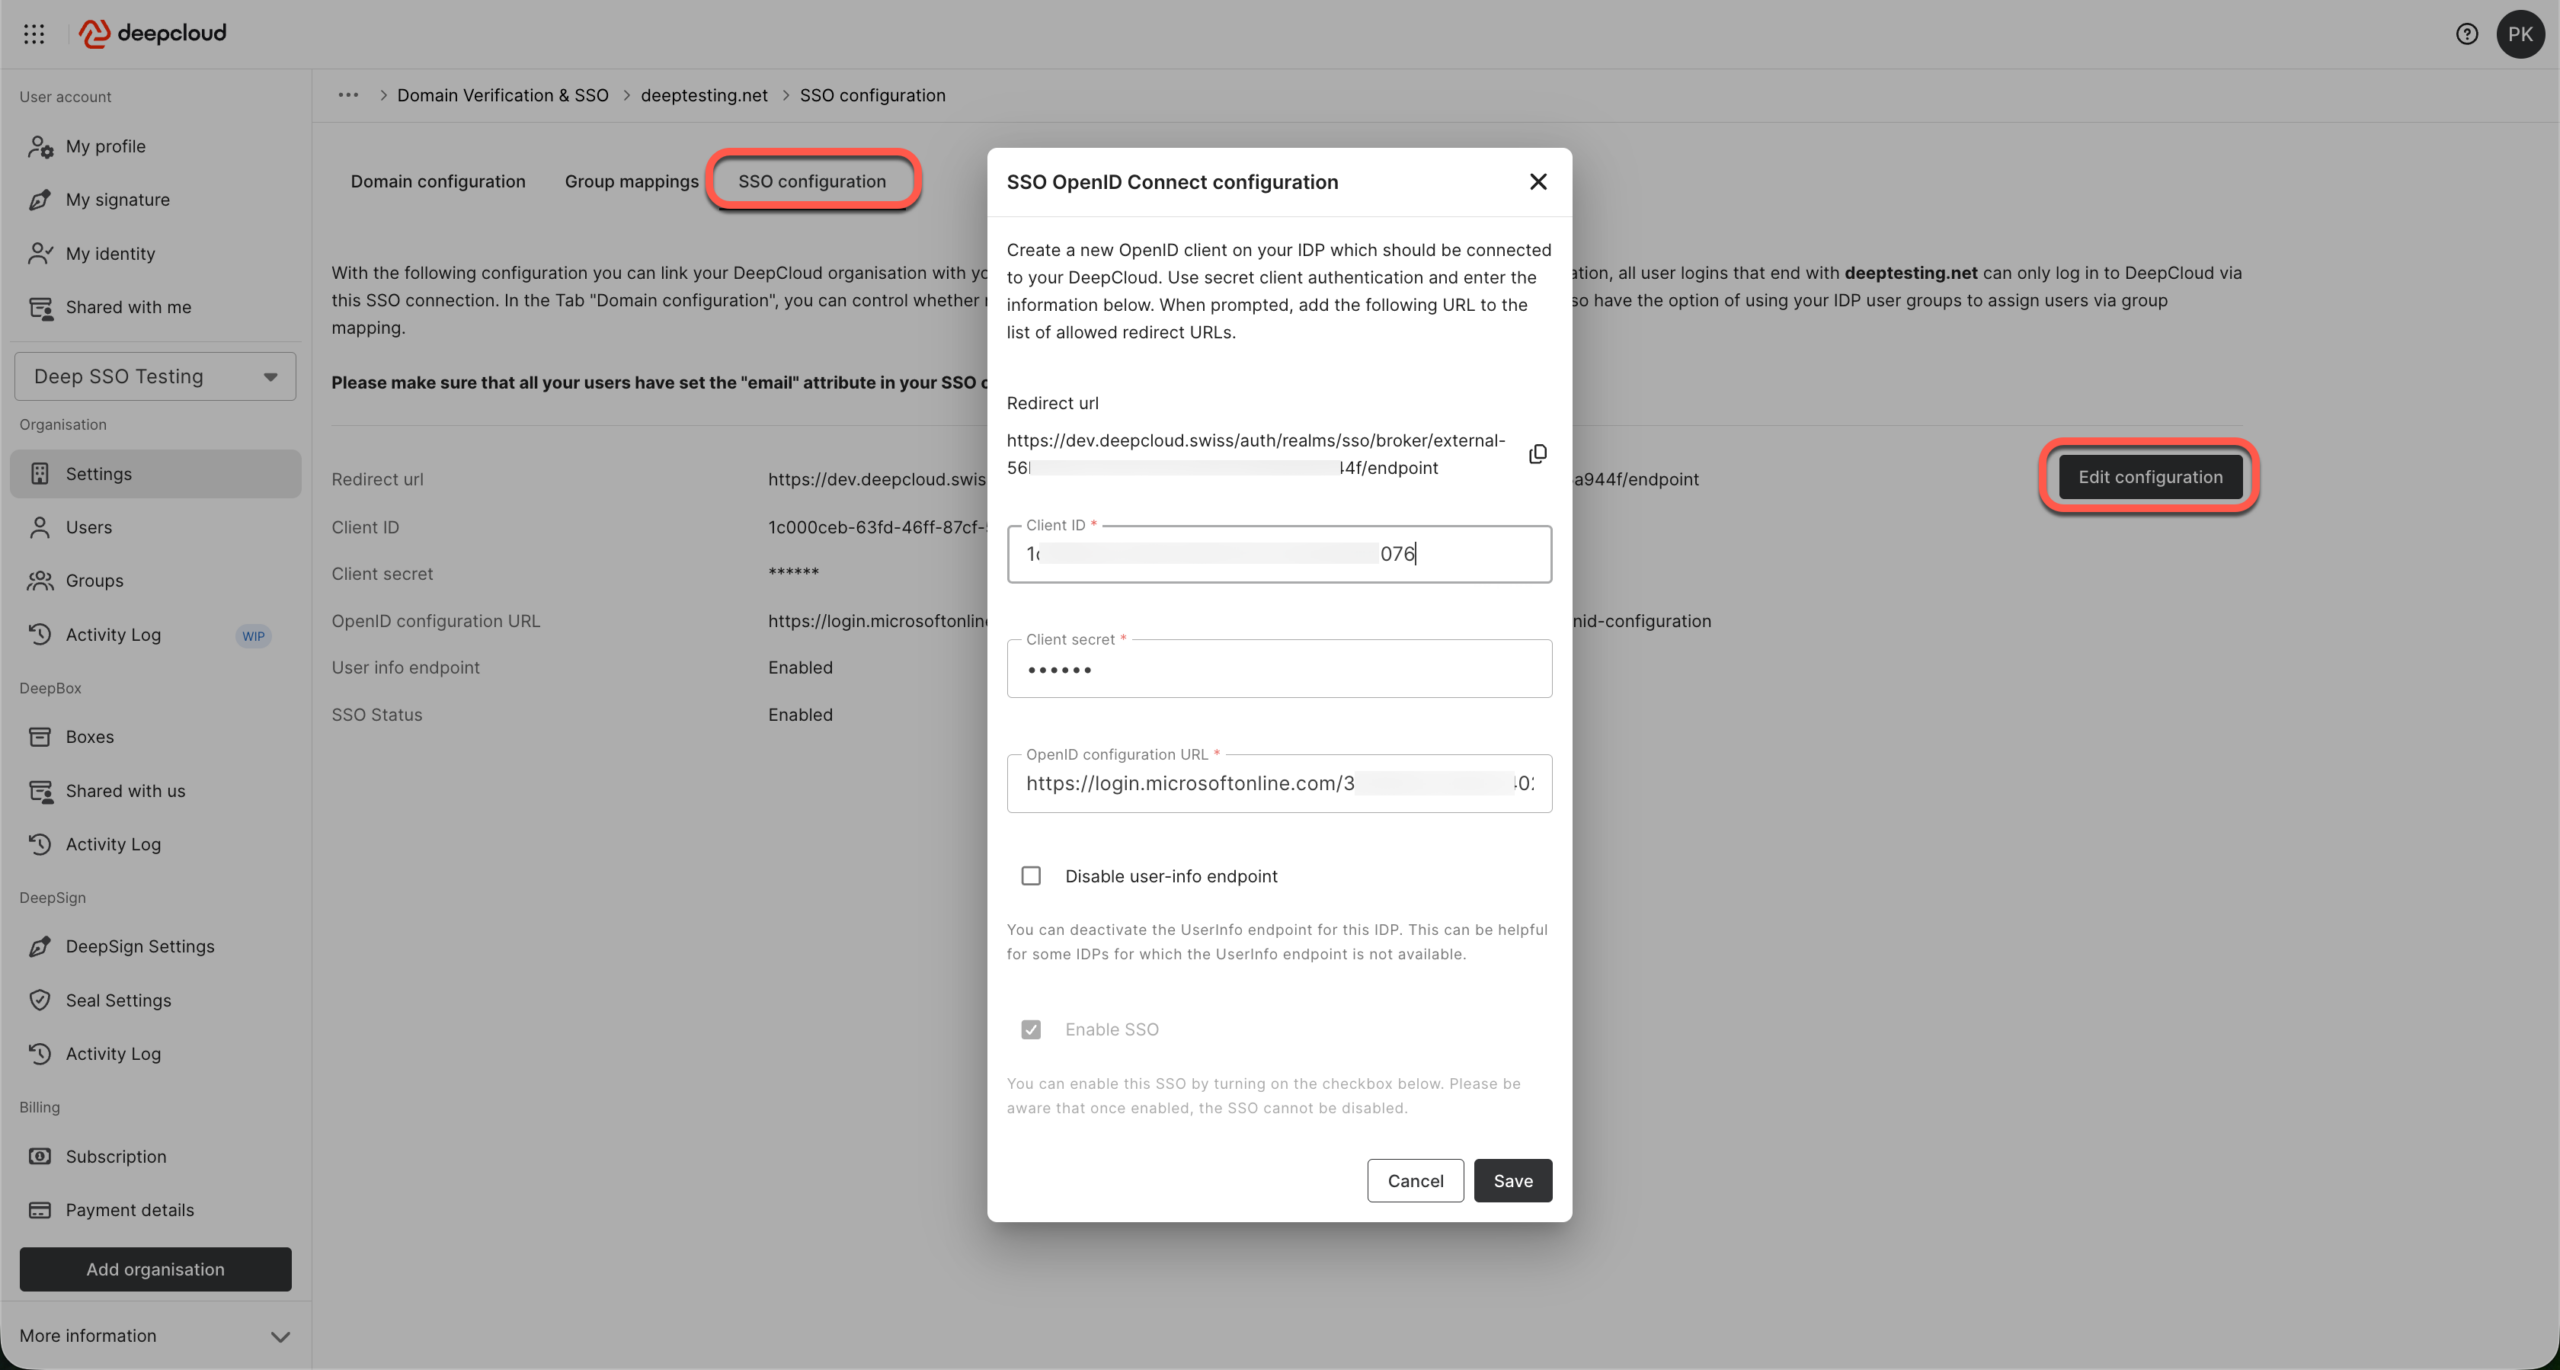
- Switch to the SSO configuration tab to create a new configuration or edit an existing one.
- Enter the values according to your IdP configuration:
- Client ID
- Secret client key
- OpenID configuration URL
- Copy the redirect URL displayed in DeepCloud and add it to the app integration of your IdP.
- Enable the Activate SSO option and click Save.
NOTE!
Once the SSO configuration for a domain is activated, users of this domain can only log in to DeepCloud via this SSO sign-in.
Set up SSO configuration in Microsoft Entra-ID
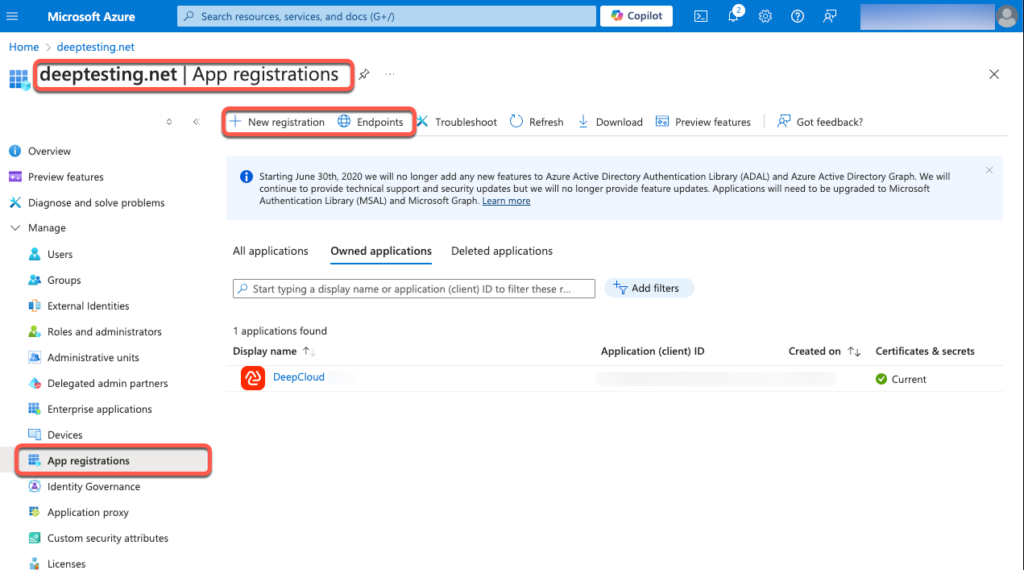
- Search for the app registrations in the Azure portal
Go to the Azure portal and navigate to Azure Active Directory > Microsoft Entra ID > App registrations. - Click on “New registration”
a. Give the app integration a suitable name, e.g. “DeepCloud” (this will be displayed to users when they initially log in)
b. Define which users have access to the web app integration. (Recommendation: All users of the organization have access)
c. Insert the redirect URL from the DeepCloud SSO configuration as redirect URI
d. Finish - Now copy the Application (Client) ID into the SSO configuration of the DeepCloud
- Create a new client secret and copy the secret into the SSO configuration of the DeepCloud
a. Navigate to Certificates & secrets
b. Add a new client
i. Enter a suitable description
ii. Select the validity period
iii. Finish
c. Copy the value of the secret into the SSO configuration of the DeepCloud (ATTENTION: The secret is only displayed initially, after that it can no longer be viewed) - The OpenID configuration URL can be found at Entra ID in the endpoints > OpenID Connect metadata document
Optional: In order for the user information to be updated at login (e.g. name change on marriage), this information must be added to the ID token.
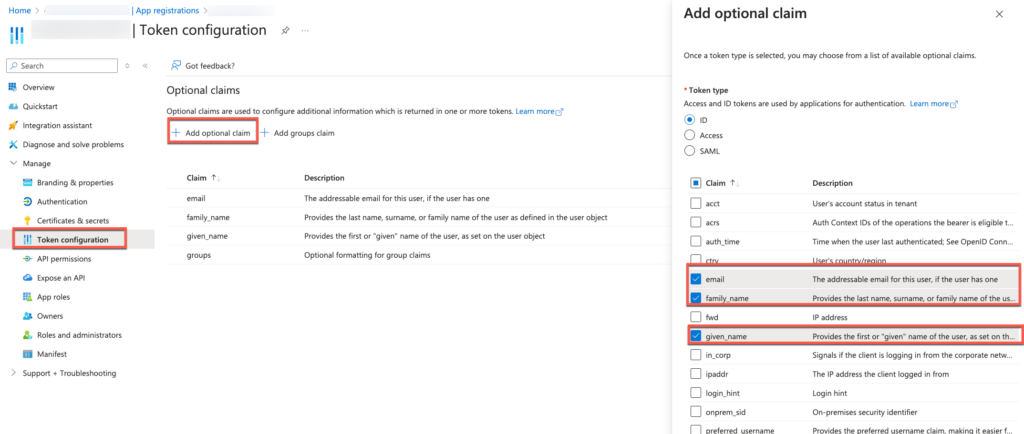
- Add claims for the ID token
a. Navigate to Token configuration
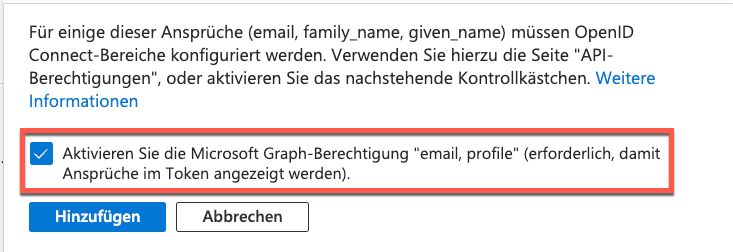
b. Add the following claims to the ID token via “Add optinal claim”: email, familiy_name, given_name - Extend the permissions of the Graph API
a. Once the claims have been added, the required Microsoft Graph authorizations (email, profile) can be added directly.
Set up SSO configuration in OKTA
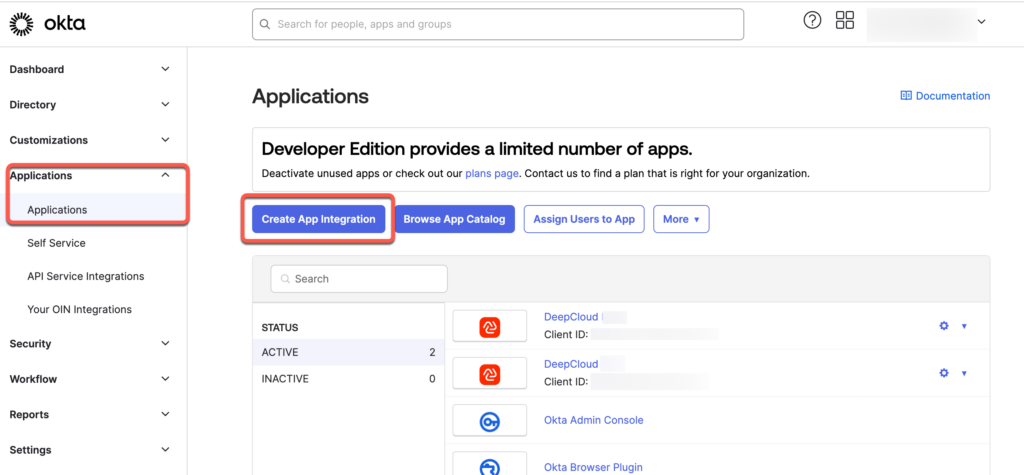
- Navigate Okta Admin Dashboard to the application
Go to the Okta Admin Dashboard and navigate to Applications > Applications. - Click on “Create App Integration”
a. Select “OIDC – OpenID Connect” as the sign-in method
b. Select “Web Application” as the application type
c. Give the app integration a suitable name, e.g. “DeepCloud” (this will be displayed to users when they log in)
d. Insert the redirect URL from the DeepCloud SSO configuration as the sign-in redirect URI
e. Define which users have access to the web app integration. (Recommendation: All users of the organization have access)
f. Finish - Now copy the client ID and the client secret into the SSO configuration of the DeepCloud
- You can find the OpenID configuration URL at OKTA under Security > API.
- Select the desired Authorization Server that you want to use for the DeepCloud application. Normally this is “Default” and open the settings
a. The Metadata URI is specified under Settings. You can transfer these to the SSO configuration of the DeepCloud
Deactivating the SSO configuration
The SSO configuration can only be deactivated by sending an email to support[at]deepcloud.swiss.
Did this answer your question?
Related articles
SSO Group Mapping
With Group Mappings, owners and admins can link groups from their identity provider (IdP) to organizations, roles, and groups in DeepCloud. This allows the ...
How can I change my subscription?
You can make changes to your subscription yourself under the menu item “Subscription” in the account management. You can access the subscription overview under ...