Signature process
Automatically translated
Start signature process
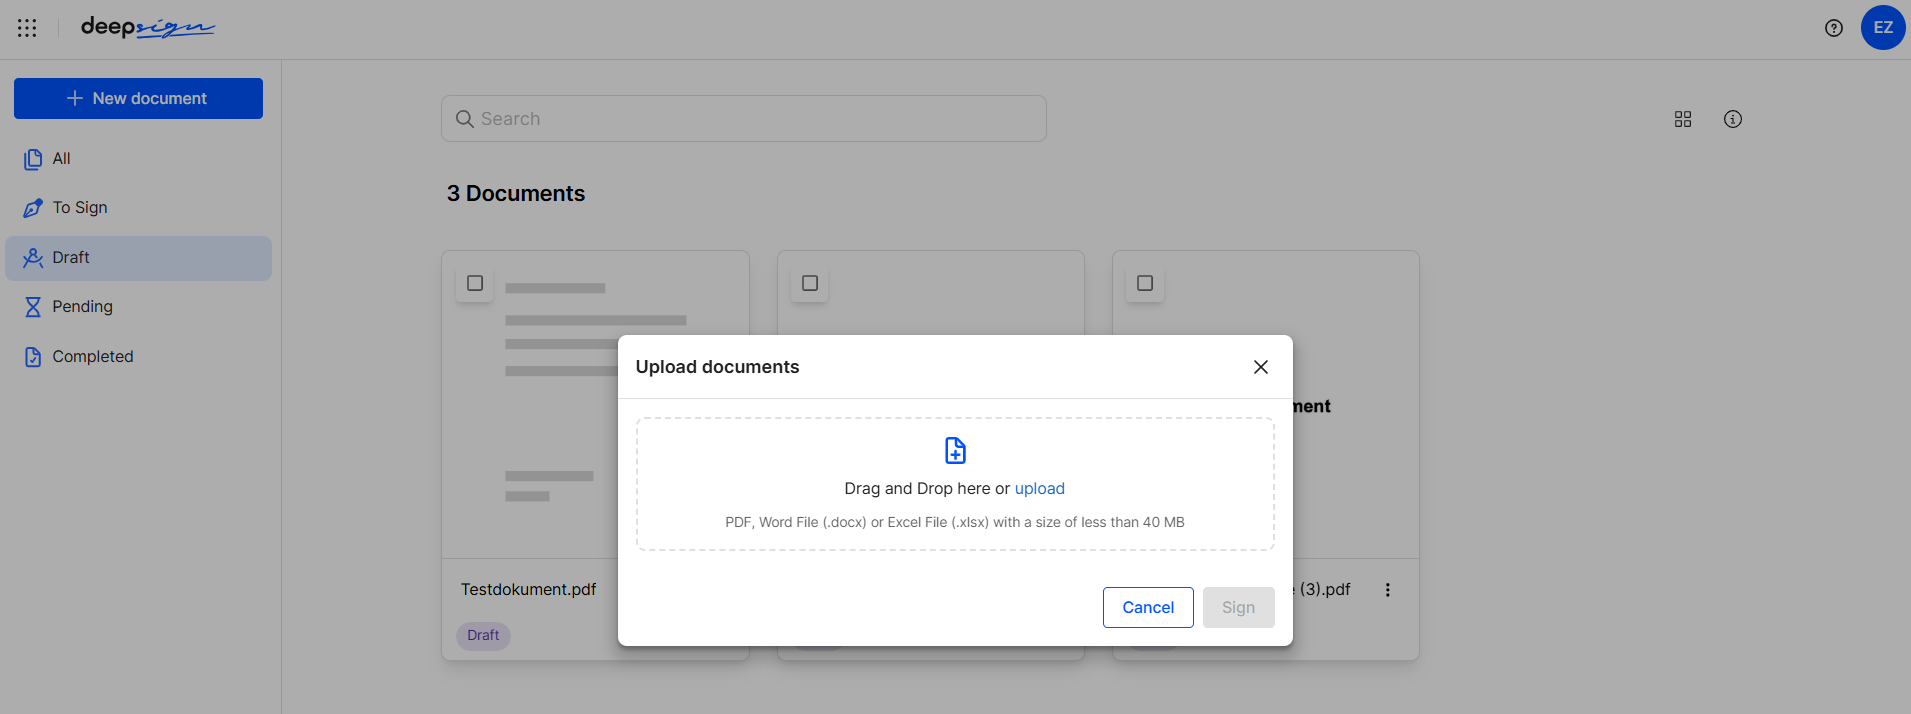
The signature process can be easily started in the DeepSign Cockpit by uploading a document (PDF, Word or Excel file) via drag & drop or via the upload button (New document).
Tip: You can also upload several documents at the same time.
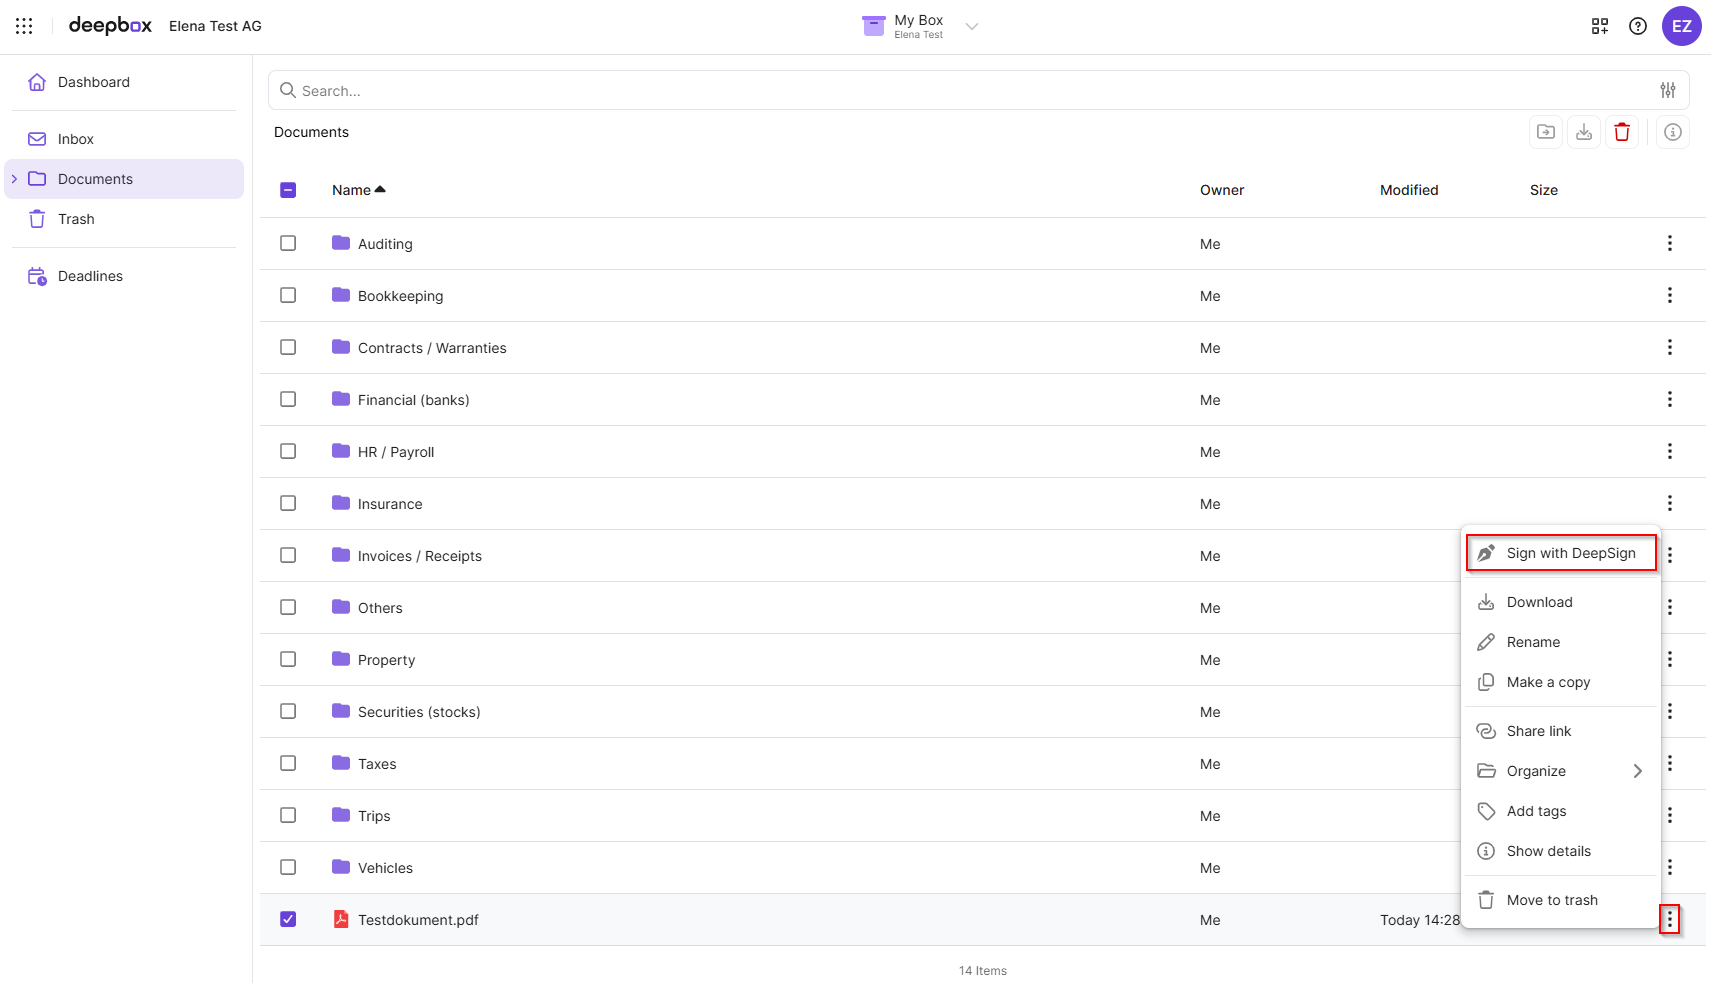
Alternatively, the signature process in the DeepBox for a document (PDF, Word or Excel file) can also be started directly via the context menu.
You also have the option to upload multiple documents at once and send them to signers in a single transaction using the Envelope feature. Learn more in our support article: DeepSign Envelope Feature
Define signature process
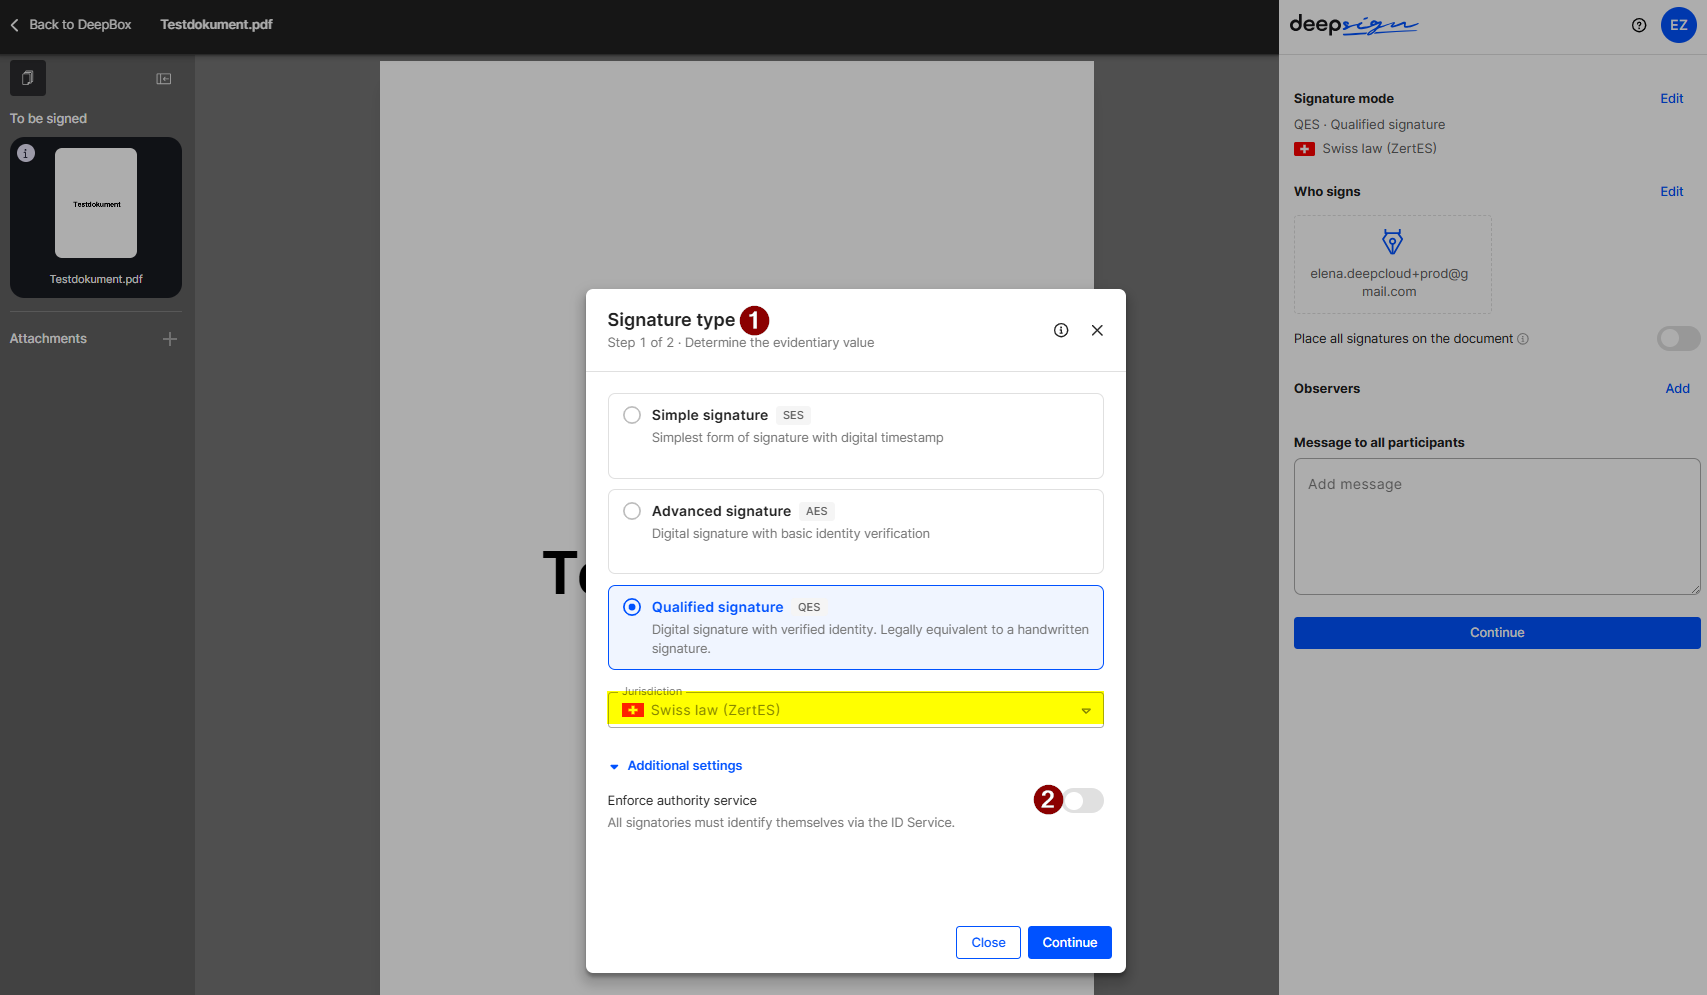
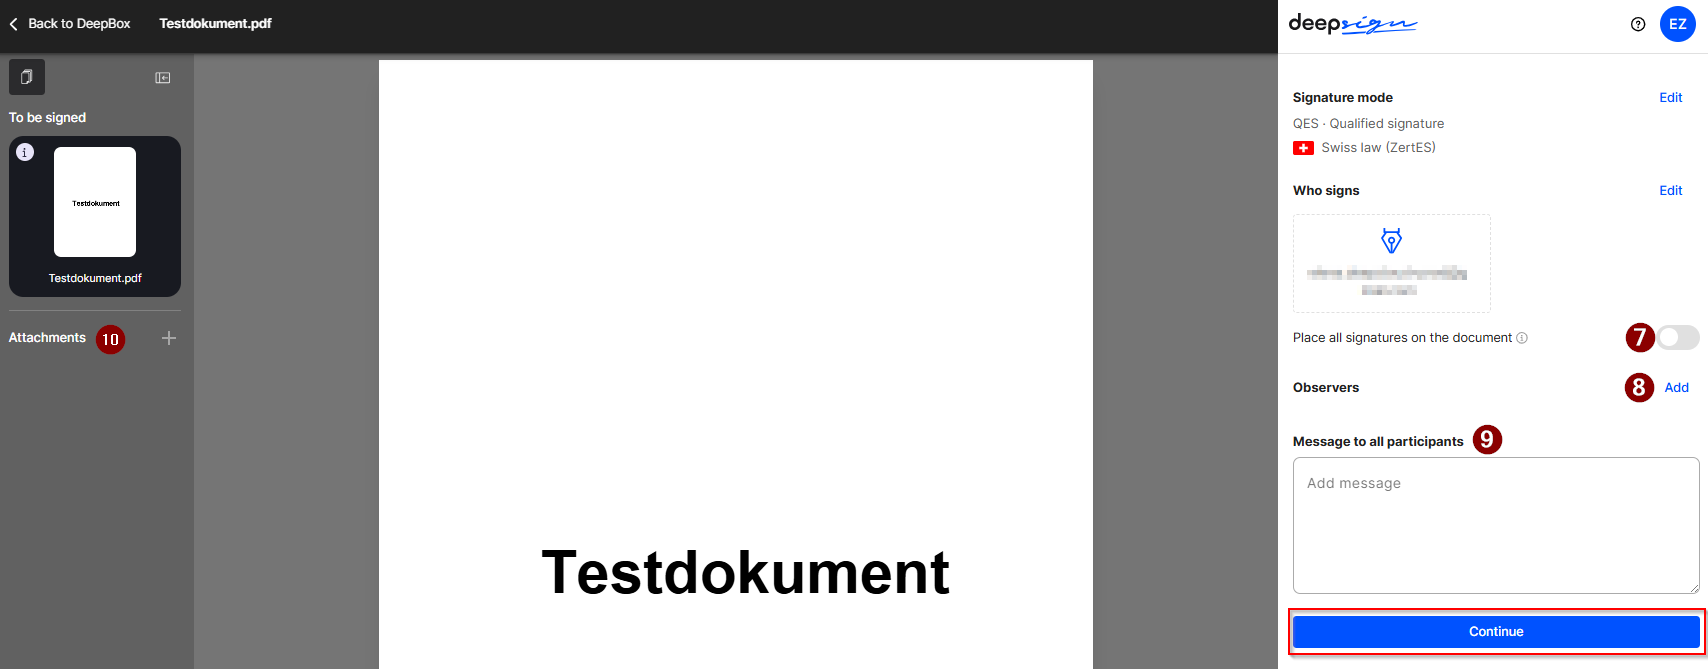
- Signature Type: First, select the appropriate security level based on the document. If an advanced or qualified signature is required, you must specify the applicable legal jurisdiction (CH or EU).
- Enforcing the ID Service: By default, signers can choose between DeepID and Mobile ID. However, it is possible to enforce the use of one of the two ID services.
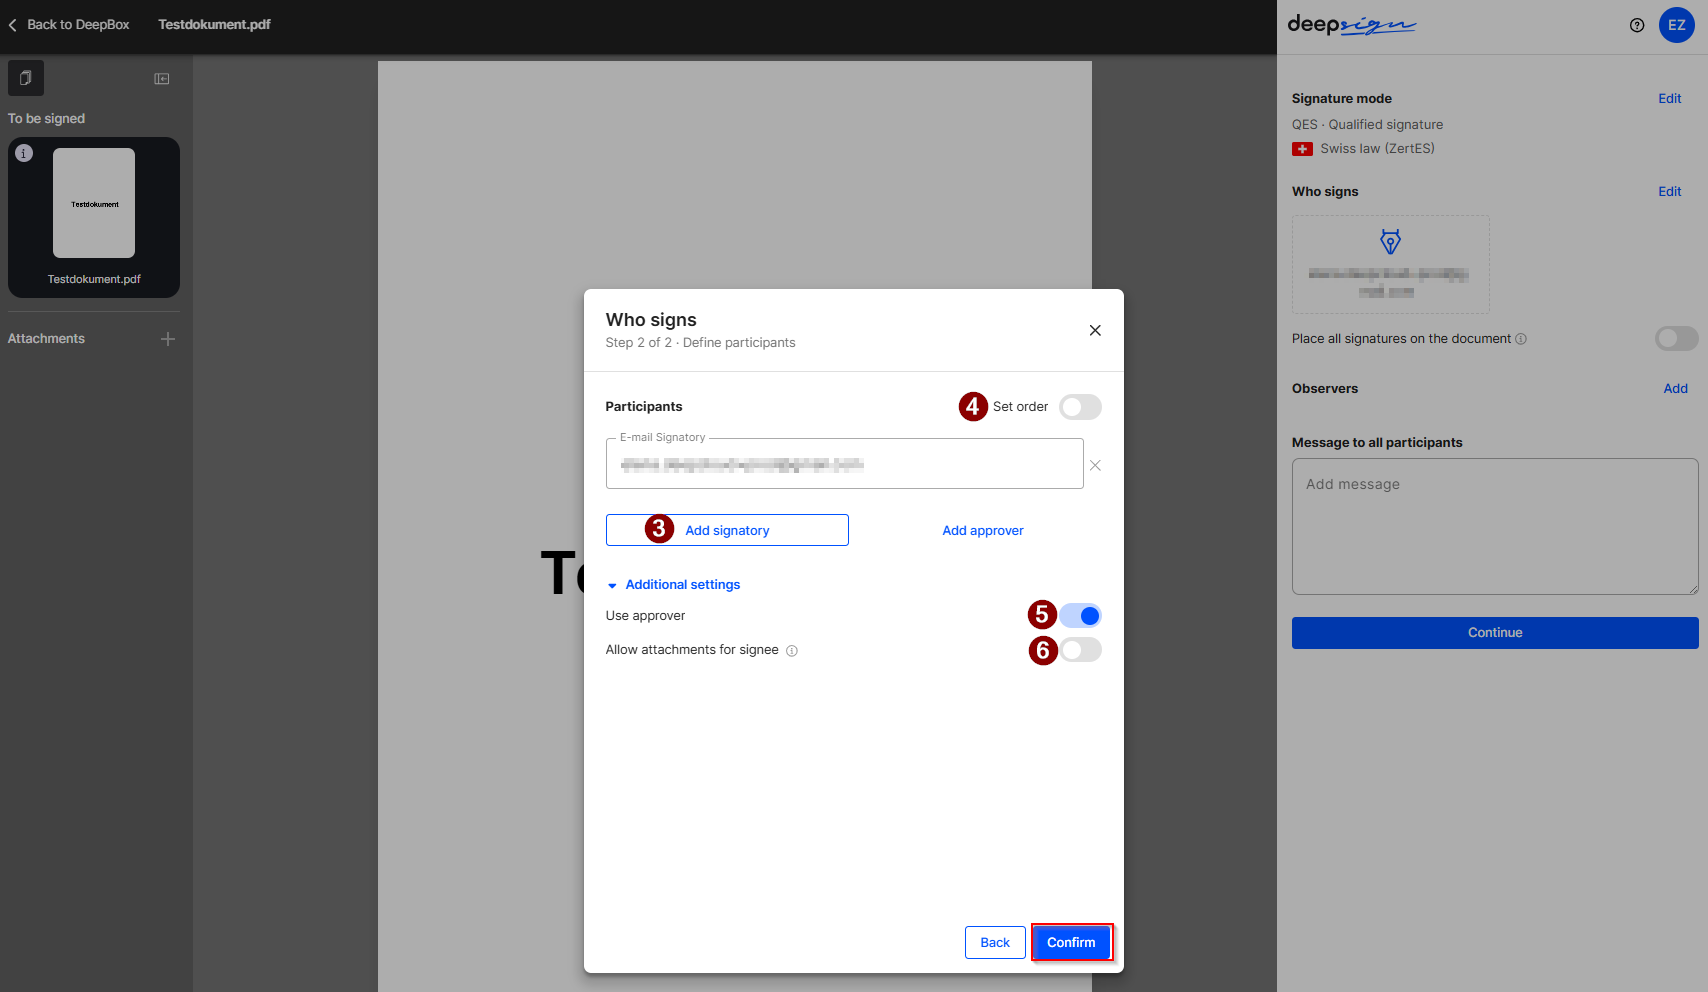
- Add signatories: Next, enter the email addresses of the people who will be signing.
- Specify the order: If signatures are to be provided in a specific order—for example, by the tenant and the landlord—you can specify the order in which they are to sign.
- Approver: The approver feature allows you to add an additional approval step before the actual signing takes place. The signing process does not continue until the designated approver has reviewed and approved the document. This feature is suitable, for example, for internal approvals by supervisors or the legal department. Approvals are free and available starting with the DeepCloud Small subscription.
- Allow attachments for signers: The invited person can upload additional documents as attachments before signing. Attachments can only be uploaded if no one has signed the document yet. If an order has been defined, only one person from the first group may upload attachments.
- Place Signature: This option allows you to choose whether to place the visible signature on the document.
- Observer: As an observer, you can view the document and the current status of the signing process without having to sign it yourself. Observers with admin privileges can also withdraw the document or send reminders.
- Notice to all participants: You can include a comment that will be sent along with the email invitation.
- Add attachments: The initiator of a signature process can attach files up to 40 MB in size to the document.
Sign
After starting the signature process, all persons involved receive an e-mail invitation to sign the document. They can access the document via the link in the email. A simple signature can be signed as a guest. However, a DeepCloud account is required for advanced and qualified signatures, both for reading and signing the document.
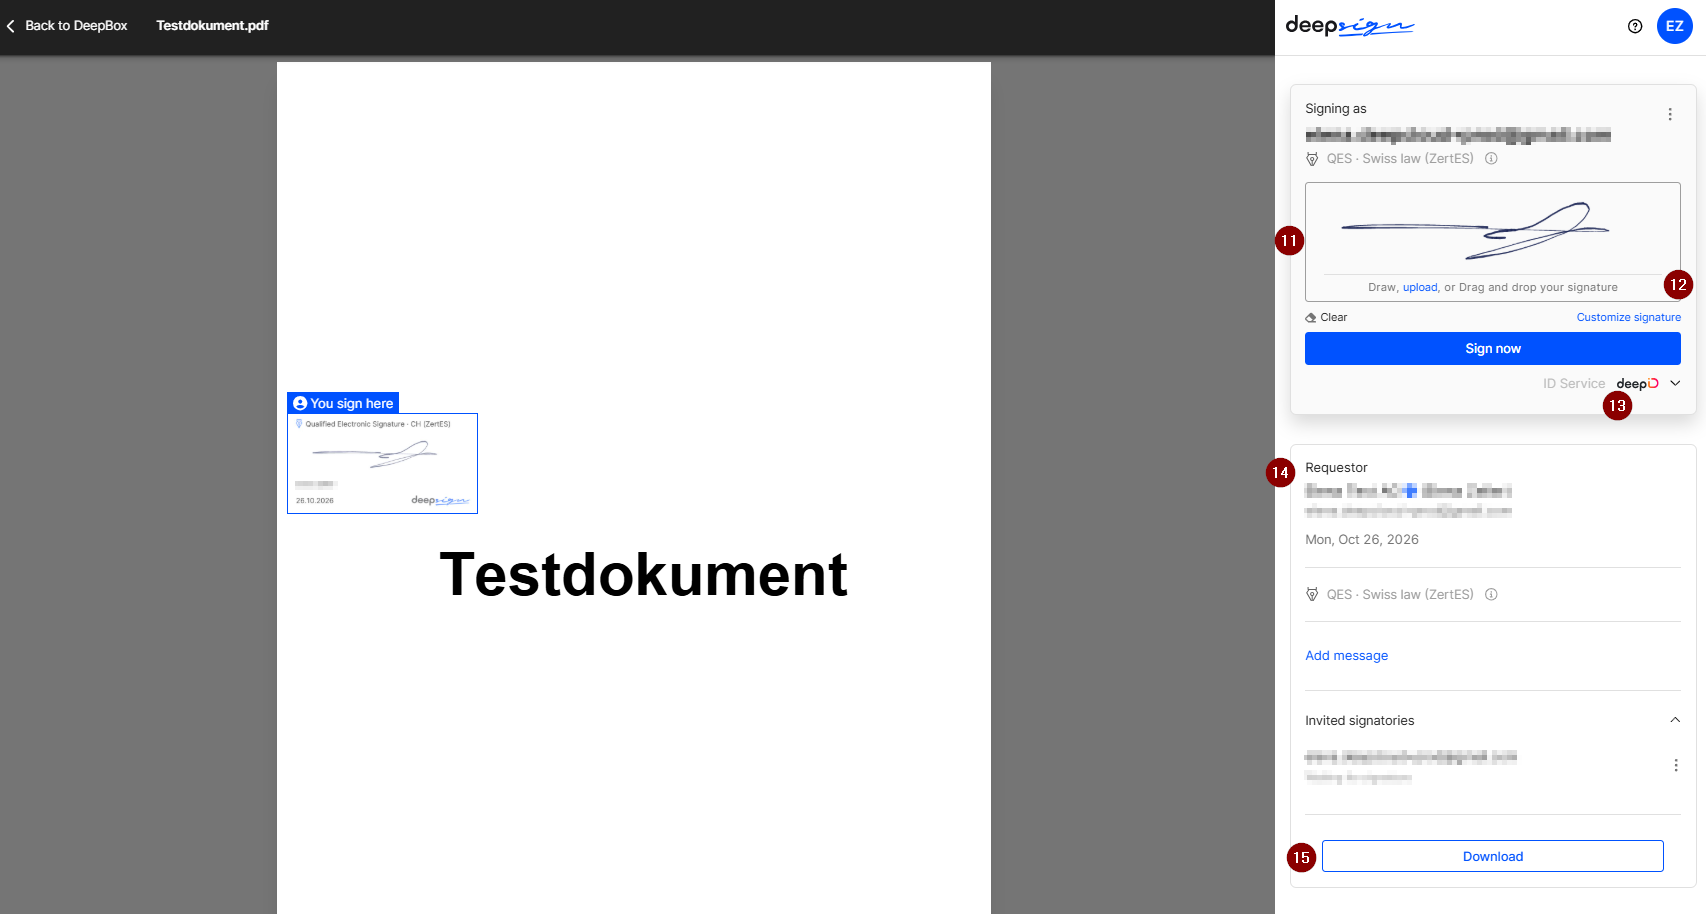
Various functions and information are available in signature mode (see illustration above):
- Visual signature: The signatory can enter a visual signature here. If this field remains empty, the name of the signatory is automatically entered in the visual signature.
- Customize signature: Opens an additional window in which further settings for the visual signature can be made.
- ID service: The signatory can choose between DeepID and Mobile ID. This is not required for the simple signature.
- Information: Various information is displayed, such as the applicant, an optional message and the invited participants in the signature process.
- Download: The document can be downloaded at any time.
Complete the signature process
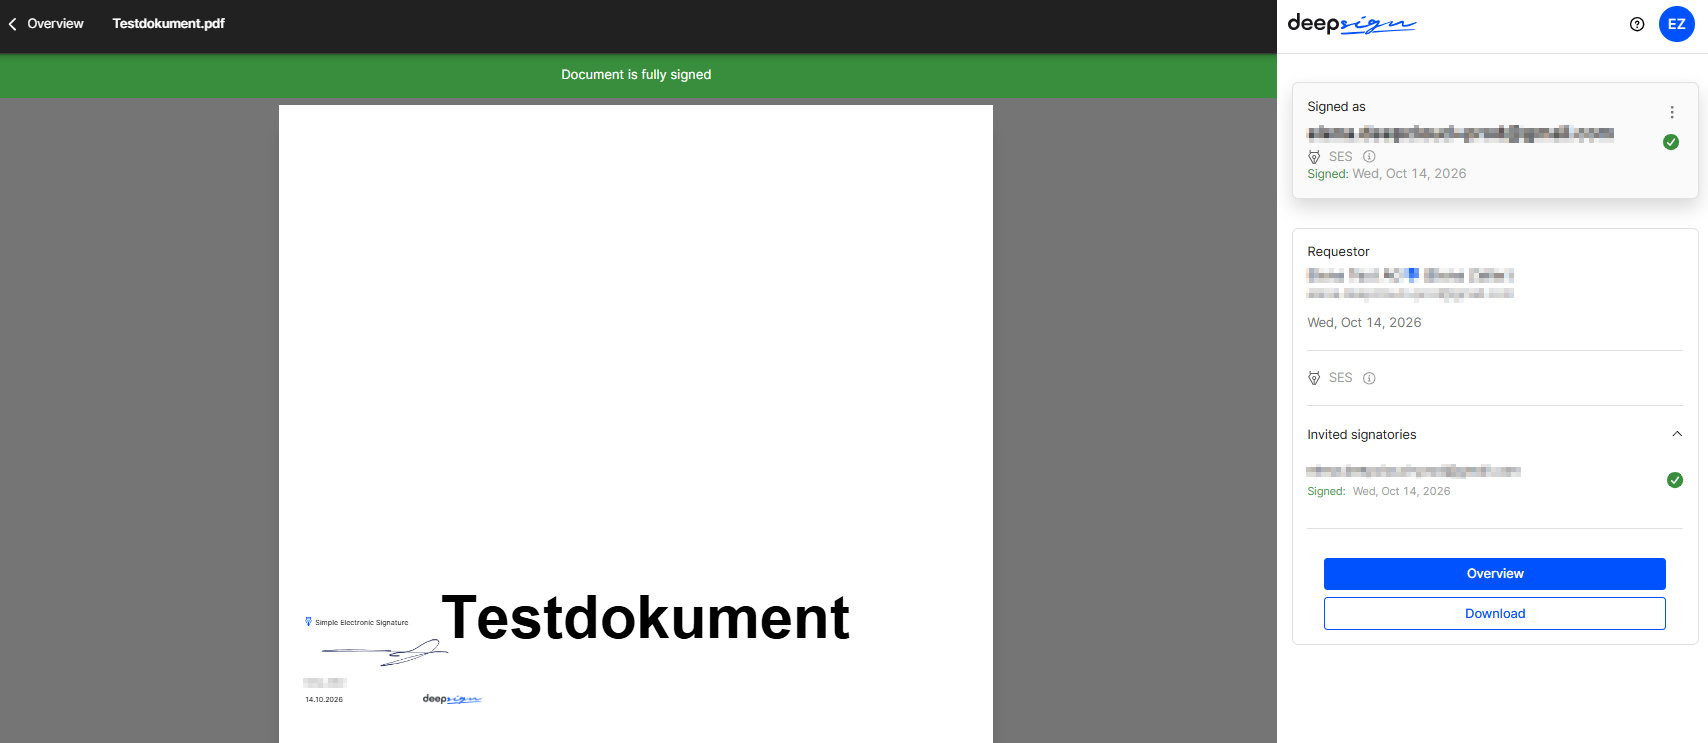
Once the document has been signed by all participants, the signature process is complete. The document can now be downloaded and used.
Did this answer your question?
Related articles
Advanced electronic signature
The AES is legally valid for contracts for which no formal requirement has been specified by law. As the signature is clearly assigned to the signatory, the probative value is ...
How do I open a DeepSign account?
This video shows the registration process for using DeepSign. Compared to DeepBox registration, this process only offers the option of registering an organization. It is not ...
Multiple visual signature
You have the option of visually placing the same signature multiple times within a document. This means that the same person can place their signature on different pages within the...
DeepSign Envelope Feature
The Envelope feature allows you to send multiple documents to signers in a single process at the same time. Example: Muster AG wants to send a new employee several documents for ...